前言
Gitea是一个轻量级的代码托管服务,类似于Github。Gitea是一个开源项目,可以在Github上找到源码。Gitea使用Go语言编写,支持Linux、Windows、MacOS等操作系统。Gitea的安装非常简单,只需要一个二进制文件即可。但是我们这里使用Docker来部署Gitea,这样我们可以更好的管理Gitea的版本。
如果需要更详细的介绍可以前往官方文档查看。
使用Docker安装Gitea
首先确认你的服务器或本地机器安装了Docker与docker-compose。并且你Linux机器上面的用户具有访问Docker的权限。
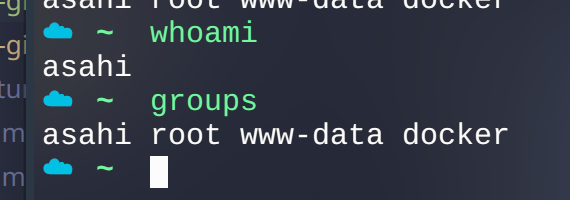 确保你的用户在
docker组中。
创建工作空间
mkdir ~/projects/gitea/giteamkdir ~/projects/gitea/mysql编写docker-compose.yml与配置文件
cd ~/projects/giteavim docker-compose.ymlversion: "3"
networks: gitea: external: false
services: gitea: image: gitea/gitea:latest container_name: gitea environment: - USER_UID=1000 - USER_GID=1000 - GITEA__database__DB_TYPE=mysql - GITEA__database__HOST=db:3306 - GITEA__database__NAME=gitea - GITEA__database__USER=gitea - GITEA__database__PASSWD=gitea - DISABLE_REGISTRATION=true - DOMAIN=gitea.localhost.com - ROOT_URL="http://gitea.localhost.com/" restart: always networks: - gitea volumes: - ./gitea:/data - /etc/timezone:/etc/timezone:ro - /etc/localtime:/etc/localtime:ro ports: - "12300:3000" - "12022:22" depends_on: - db db: image: mysql:8 restart: always environment: - CONFIG_FILE=/data/config.yaml - MYSQL_ROOT_PASSWORD=gitea - MYSQL_USER=gitea - MYSQL_PASSWORD=gitea - MYSQL_DATABASE=gitea networks: - gitea volumes: - ./mysql:/var/lib/mysql这里有几个需要注意的配置:
networks,我们要让mysql和gitea服务在同一个网络环境下,两个服务才能互相通信。USER_UID和USER_GID是启动服务的用户ID和组ID,使用一个具有docker组的用户就可以。一般来说1000是默认的root用户组,可以直接用。GITEA__database__*,这些配置是数据库的配置,包括密码、端口、用户名之类的配置,最好自己修改一下,虽然是内网服务,但是还是需要具有安全意识。ROOT_URL、ports这些配置按照自己的需求进行修改。
启动服务
docker-compose up -d 这样就可以启动Gitea服务了,访问你配置的域名或者IP端口就可以看到Gitea的界面了。Gitea会要求你配置管理员账号,按照提示进行配置即可。
配置Gitea Action Runner
下载act_runner
这里不推荐用Docker来部署act_runner。我们的容器会需要访问宿主机的网络,并且需要访问Docker的socket。这样会导致容器的权限过高。act-runner本身部署仅仅为一个二进制文件,不需要其他的依赖,所以用Docker并没有明显优势。
我们可以直接在Gitea的release页面下载act_runner的二进制文件。act_runner
我们将下载的二进制文件放到~/projects/gitea-runner文件夹中,
配置act_runner
1. 生成配置文件
cd ~/projects/gitea-runner./act_runner generate-config > config.yaml # 生成默认配置文件2. 获取令牌
Runner级别决定了从哪里获取注册令牌。
- 实例级别:管理员设置页面,例如 your_gitea.com/admin/actions/runners。
- 组织级别:组织设置页面,例如 your_gitea.com/org/settings/actions/runners。
- 存储库级别:存储库设置页面,例如 your_gitea.com/owner/repo/settings/actions/runners。
如果您无法看到设置页面,请确保您具有正确的权限并且已启用 Actions。
注册令牌的格式是一个随机字符串 D0gvfu2iHfUjNqCYVljVyRV14fISpJxxxxxxxxxx。
按照官方文档介绍的地址,前往刚刚部署的Gitea网站,注册自己的容器令牌。
3. 注册容器
./act_runner --config config.yaml register按照提示填入即可。 4. 修改标签(可选)
容器的标签在CI脚本中会使用到,我多配置了一个node20的标签来使用。
# Example configuration file, it's safe to copy this as the default config file without any modification.
# You don't have to copy this file to your instance,# just run `./act_runner generate-config > config.yaml` to generate a config file.
log:  # The level of logging, can be trace, debug, info, warn, error, fatal  level: info
runner:  # Where to store the registration result.  file: .runner  # Execute how many tasks concurrently at the same time.  capacity: 1  # Extra environment variables to run jobs.  envs:    A_TEST_ENV_NAME_1: a_test_env_value_1    A_TEST_ENV_NAME_2: a_test_env_value_2  # Extra environment variables to run jobs from a file.  # It will be ignored if it's empty or the file doesn't exist.  env_file: .env  # The timeout for a job to be finished.  # Please note that the Gitea instance also has a timeout (3h by default) for the job.  # So the job could be stopped by the Gitea instance if it's timeout is shorter than this.  timeout: 3h  # Whether skip verifying the TLS certificate of the Gitea instance.  insecure: false  # The timeout for fetching the job from the Gitea instance.  fetch_timeout: 5s  # The interval for fetching the job from the Gitea instance.  fetch_interval: 2s  # The labels of a runner are used to determine which jobs the runner can run, and how to run them.  # Like: "macos-arm64:host" or "ubuntu-latest:docker://gitea/runner-images:ubuntu-latest"  # Find more images provided by Gitea at https://gitea.com/gitea/runner-images .  # If it's empty when registering, it will ask for inputting labels.  # If it's empty when execute `daemon`, will use labels in `.runner` file.  labels:    - "ubuntu-latest:docker://gitea/runner-images:ubuntu-latest"    - "ubuntu-22.04:docker://gitea/runner-images:ubuntu-22.04"    - "ubuntu-20.04:docker://gitea/runner-images:ubuntu-20.04"    - "node20:docker://node:20-buster"cache:  # Enable cache server to use actions/cache.  enabled: true  # The directory to store the cache data.  # If it's empty, the cache data will be stored in $HOME/.cache/actcache.  dir: ""  # The host of the cache server.  # It's not for the address to listen, but the address to connect from job containers.  # So 0.0.0.0 is a bad choice, leave it empty to detect automatically.  host: ""  # The port of the cache server.  # 0 means to use a random available port.  port: 0  # The external cache server URL. Valid only when enable is true.  # If it's specified, act_runner will use this URL as the ACTIONS_CACHE_URL rather than start a server by itself.  # The URL should generally end with "/".  external_server: ""
container:  # Specifies the network to which the container will connect.  # Could be host, bridge or the name of a custom network.  # If it's empty, act_runner will create a network automatically.  network: ""  # Whether to use privileged mode or not when launching task containers (privileged mode is required for Docker-in-Docker).  privileged: false  # And other options to be used when the container is started (eg, --add-host=my.gitea.url:host-gateway).  options:  # The parent directory of a job's working directory.  # NOTE: There is no need to add the first '/' of the path as act_runner will add it automatically.  # If the path starts with '/', the '/' will be trimmed.  # For example, if the parent directory is /path/to/my/dir, workdir_parent should be path/to/my/dir  # If it's empty, /workspace will be used.  workdir_parent:  # Volumes (including bind mounts) can be mounted to containers. Glob syntax is supported, see https://github.com/gobwas/glob  # You can specify multiple volumes. If the sequence is empty, no volumes can be mounted.  # For example, if you only allow containers to mount the `data` volume and all the json files in `/src`, you should change the config to:  # valid_volumes:  #   - data  #   - /src/*.json  # If you want to allow any volume, please use the following configuration:  # valid_volumes:  #   - '**'  valid_volumes: []  # overrides the docker client host with the specified one.  # If it's empty, act_runner will find an available docker host automatically.  # If it's "-", act_runner will find an available docker host automatically, but the docker host won't be mounted to the job containers and service containers.  # If it's not empty or "-", the specified docker host will be used. An error will be returned if it doesn't work.  docker_host: ""  # Pull docker image(s) even if already present  force_pull: true  # Rebuild docker image(s) even if already present  force_rebuild: false
host:  # The parent directory of a job's working directory.  # If it's empty, $HOME/.cache/act/ will be used.  workdir_parent:
配置启动\停止脚本
因为我们需要后台运行这个二进制文件,所以最好编写启动和停止脚本来实现。
启动脚本
#!/bin/bash
# 检查是否存在pid文件if [ -f ./act_runner.pid ]; then  echo "act_runner进程已经启动,请先停止!"  exit 1fi
# 启动act_runner进程nohup ./act_runner daemon --config config.yaml &echo $! > ./act_runner.pid
echo "act_runner进程已启动!"
停止脚本
#!/bin/bash# 检查pid文件是否存在if [ ! -f ./act_runner.pid ]; then  echo "act_runner进程未启动,无需停止!"  exit 1fi# 获取pidpid=$(cat ./act_runner.pid)# 使用kill命令终止进程kill -9 $pid
# 删除pid文件rm ./act_runner.pidecho "act_runner进程已停止!"启动act_runner
sh start.sh # 通过脚本启动如果你的配置没有问题,那么在你注册令牌的页面,可以看到容器已经上线了。

配置CD
我对自己博客自动部署的要求是:
- 提交
master分支后,触发流水线。 - 流水线使用
node 20版本进行安装依赖、部署、打包。 - 打包后的产物,通过
scp命令移动到我规定好的服务器路径。
- 提交
master分支,触发流水线,可以设置publish.yaml中的触发条件:
on: push: branches: [ master ]- 流水线使用
node 20版本的镜像进行安装。
build: # The type of runner that the job will run on runs-on: node20- 自动提交产物。这里我们需要让容器可以访问我们的服务器,所以容器需要设置好一个可以访问服务器的私钥,然后服务器需要持有这个私钥对应的公钥,来验证访问。所以我们需要配置
secrets。
name: Deploy My Serveron:  push:    branches: [ master ]
  # Allows you to run this workflow manually from the Actions tab  workflow_dispatch:
# A workflow run is made up of one or more jobs that can run sequentially or in paralleljobs:  # This workflow contains a single job called "build"  build:    # The type of runner that the job will run on    runs-on: node20    # Steps represent a sequence of tasks that will be executed as part of the job    steps:      # Checks-out your repository under $GITHUB_WORKSPACE, so your job can access it      - uses: https://gitee.com/mirror-actions/checkout@v4      # 安装pnpm      - name: Install pnpm        run: npm install -g pnpm      # pnpm安装依赖      - name: Install Dependencies        run: pnpm install --frozen-lockfile      # 打包      - name: Build        run: npm run build        # 创建.ssh文件夹 并写入私钥      - name: Write ssh key        env:          PRIVATE_KEY: ${{ secrets.PRIVATE_KEY }}        run: mkdir -p ~/.ssh && echo "$PRIVATE_KEY" > ~/.ssh/id_rsa && chmod 600 ~/.ssh/id_rsa      - name: Add known_hosts        env:          SERVER_IP: ${{ secrets.SERVER_IP }}        run: ssh-keyscan $SERVER_IP >> ~/.ssh/known_hosts      - name: echo pwd        run: pwd        # 运行 sh ./cmd/publish.sh 脚本      - name: Deploy        run: sh ./cmd/publish.sh